



News Center
How to Choose the Right Stencil Inspection Machine for Your SMT Line (2026 Buyer's Guide)
 2026-11-04
 104
Every SMT engineer knows the drill. A board comes back with solder bridges, insufficient paste, or tombstoning. You check the printer, the paste, the pad design… and then you look at the stencil. A single clogged aperture, a torn mesh, or a stencil that has quietly lost tension can wreck yield for hours before anyone connects the defect back to the source.
A stencil inspection machine exists to catch these issues before they reach the printer. But not every machine on the market solves the same problem. Some are built for incoming-quality checks on brand-new stencils; others are designed for daily process control after cleaning and line changes. Choose the wrong one and you either overpay for features you will never use, or buy a tool that cannot actually detect what is failing on your line.
Below is the framework we use at SUBIT when helping SMT engineers evaluate stencil inspection equipment. Use it before you request your first quote.
1、Define the job the machine must actually do
Before looking at any spec sheet, answer one question: at which point in the stencil lifecycle do you need to inspect?
Incoming inspection — verify new stencils match Gerber/CAD before factory acceptance.
Post-cleaning inspection — confirm apertures are fully clear after the wash cycle.
Pre-line-change check — verify condition before switching product.
Periodic condition monitoring — track tension, wear, and cleanliness across hundreds of uses.
A machine built for incoming inspection usually relies on Gerber file comparison. A machine built for recurring process control should use standard templates taken from already-approved stencils — no Gerber parsing on the shop floor. If your pain point is daily quality control (which is where most SMT fabs quietly lose the most money), a Gerber-free, template-based system will be faster, cheaper to operate, and actually get used by floor staff.
2、Verify the inspection accuracy you really need
Stencil defects are measured in micrometres. Two numbers matter more than the rest:
Repeatability accuracy — how consistently the machine re-measures the same stencil. Look for ±10 μm or better.
Minimum detectable aperture size — for fine-pitch, QFN, and CSP work, you need resolution down to at least 60 × 60 μm.
Then inspect the optical system yourself: camera resolution (20 MP is now the baseline), lens quality, and bottom-side lighting. Poor illumination is the #1 reason "automatic" inspection machines miss residue on small apertures.
3、Do not skip tension measurement
Stencil tension drifts with every print cycle, every cleaning, and every clamp/unclamp. A stencil that started at 40 N/cm² may fall below 30 N/cm² after a few hundred prints — and that is exactly when paste release becomes inconsistent and Defects Per Million (DPM) starts climbing.
A genuinely useful inspection machine measures tension automatically across multiple positions, with accuracy around ±1 N/cm² over a range of 0–60 N. If the machine only does optical imaging and leaves tension to a handheld tensiometer, you have not removed the manual step — you have just moved it.
4、Speed has to match your line rhythm
In a high-mix SMT shop, stencils are changed, washed, and re-loaded dozens of times a day. If each inspection takes two minutes, operators will skip it — and the machine becomes expensive shelf furniture.
Look for:
Roughly 1 second per field of view (FOV).
A single-stencil inspection measured in tens of seconds, not minutes.
One-button operation that standard floor staff can run after basic training — no CAM/Gerber specialist required.
If every report needs an engineer to interpret it, the machine will not be used on a daily basis.
5、Data and traceability are where the real ROI lives
This is the criterion buyers most often underweight. A machine that only gives you a red/green light today is worth far less than one that turns every inspection into a searchable digital record.
Demand the following out of the box:
QR-code or RFID stencil identification — the stencil is recognized automatically when loaded.
Inspection history — pull up how many times a stencil has been inspected, cleaned, and flagged, in seconds.
Cleaning cycle management — know exactly when a stencil last went through the washer and whether it passed afterward.
Automatic image/PDF reports — for SPC records and customer audits.
MES integration — push results directly into your manufacturing execution system.
The difference is strategic. Without data, stencil management stays reactive — you investigate after a defect appears on the board. With history and traceability built in, you move to predictive process control: a stencil drifting in tension or accumulating residue gets pulled before it ever causes a defect.
6、Check frame compatibility and workflow integration
Measure your largest stencil frame before you buy. Most machines support up to 736 × 736 mm frames, with a maximum inspection range around 600 × 600 mm. If you run oversized panels or extra-large PCBs, confirm this explicitly — it is not a detail you want to discover after delivery.
Also ask whether the machine can talk to the rest of your stencil workflow:
Stencil cleaning / washing equipment
Smart stencil storage and retrieval systems
Your existing MES / traceability platform
A closed loop of use → clean → inspect → assess → record → store → reuse is where the biggest long-term savings come from.
7、After-sales support is part of the specification
On imported equipment, downtime cost dwarfs the maintenance contract. Before you sign, confirm:
What is the warranty period? 12 months on the whole machine is the industry baseline.
What is the response time for technical support? 24 hours is acceptable; 7×24 support with an 8-hour response is materially better.
Are software upgrades free for the life of the machine?
Is the unit pre-commissioned before shipment, so it runs the moment power and compressed air are connected?
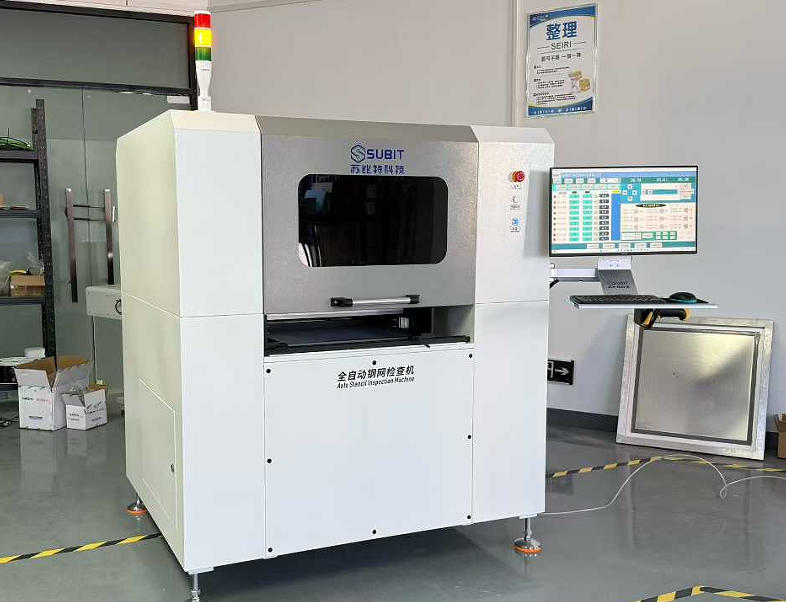
How the SUBIT SBT-JC1009SA maps to these criteria
We built the SUBIT SBT-JC1009SA specifically for the post-cleaning, pre-line-change, and periodic-monitoring use cases — not for incoming Gerber verification. On the points above:
Template-based inspection, no Gerber import required on the shop floor.
±10 μm repeatability, 60 × 60 μm minimum detectable aperture.
Automatic multi-point tension test, ±1 N/cm² accuracy, 0–60 N range.
1 second per FOV, single-button operation for standard SMT floor staff.
QR-code stencil identification, inspection history, cleaning-cycle tracking, automatic report generation, and MES data upload as standard.
Supports frames up to 736 × 736 mm, max inspection range 600 × 600 mm.
12-month whole-machine warranty, free lifetime software upgrades, 7×24 support with 8-hour response, and pre-commissioned before overseas shipment.
Every inspection result becomes part of a digital quality record, giving you complete traceability across the stencil lifecycle. In practice, that is what turns stencil management from reactive maintenance into predictive process control.
A quick checklist before you request a quote
Before talking to any vendor, have these five answers ready:
Your largest stencil frame size.
Your smallest aperture / finest paste pitch.
How many stencils you inspect per day.
Whether you already run MES and want inspection data pushed into it.
Whether you need the machine integrated with a washer or smart stencil storage.
Send those five numbers to a shortlist of vendors. The quotes you get back will suddenly be much easier to compare — and much harder to inflate.
Ready to see it on your own stencils?
Contact SUBIT for a free inspection trial on your sample stencils, or request the full SBT-JC1009SA specification sheet. We ship pre-commissioned machines worldwide, with installation support, English documentation, and 7×24 technical response.
Previous: How to Choose the Right Screen Printing Squeegee Glue Grinding Machine for Your Shop Next: How to Choose a Screen Stretching Machine: A Practical Buyer's Checklist


