



News Center
How to Choose the Right Automatic Stencil Inspection Machine for Fine-Pitch SMT: A Practical Buyer’s
 2026-09-01
 192
192
In Surface Mount Technology (SMT), the stencil printing process is frequently cited as the source of 60–70% of all assembly defects. As component geometries continue to shrink toward 01005 and finer pitches, relying on manual visual checks or basic tension gauges is no longer viable. For manufacturers navigating ultra-fine-pitch designs and relentless quality pressures, an automatic stencil inspection machine has become an operational necessity.
But how do you choose the right one? This guide walks you through the essential parameters—backed by real-world specifications—to help you make an informed decision.
1. Start with Your Core Inspection Needs
Before comparing specifications, clarify what problems you need to solve. For fine-pitch SMT production, the key concerns are typically:
Aperture blockages – solder paste residue or debris obstructing openings
Foreign objects – dust, fibers, or particles inside apertures
Tension degradation – stencil mesh losing uniformity over repeated cleaning cycles
Burrs and edge defects – residual material that can cause paste smearing or bridging
A machine that cannot reliably detect these four categories will leave you exposed to downstream SPI failures and rework costs.
2. Inspection Accuracy: The Non-Negotiable Foundation
For fine-pitch applications (0.3mm pitch and below), micron-level accuracy is not a luxury—it's a requirement. The minimum detectable defect size should be 80μm × 80μm or smaller to catch issues that affect 01005 and similar micro-components.
Beyond raw resolution, pay attention to repeatability accuracy. A specification of 3–8% repeatability ensures consistent results across multiple inspections of the same stencil. Poor repeatability means you cannot trust the data—and without reliable data, process control becomes guesswork.
3. Inspection Speed vs. Throughput Balance
Speed is measured in seconds per Field of View (FOV) . A typical benchmark is 0.9 second/FOV. But don't just chase the fastest number—look for stable speed that doesn't sacrifice accuracy.
For offline testing environments (which is the standard deployment for used stencil inspection), a complete stencil inspection cycle of 2–3 minutes is considered efficient. The key is matching the inspection cadence to your production line's beat without creating bottlenecks.
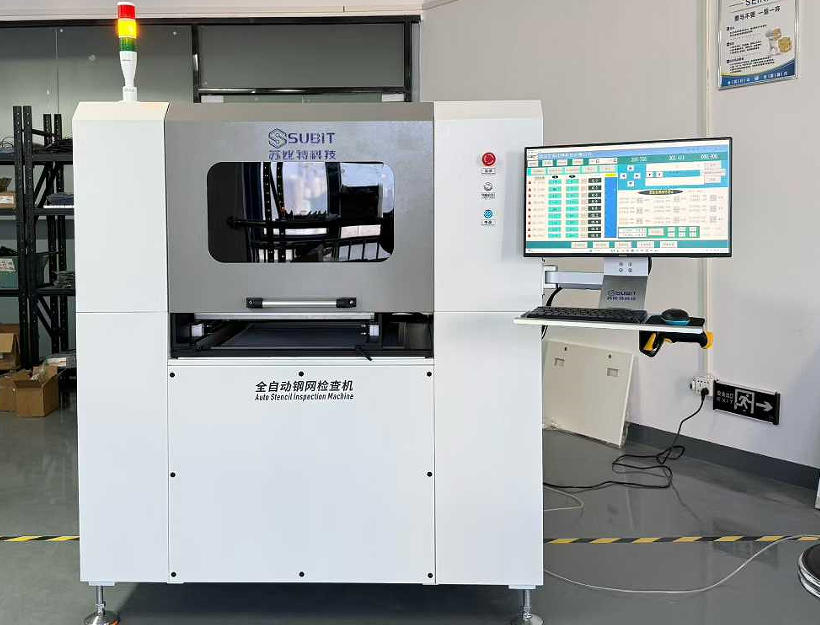
4. Tension Testing: More Than a Nice-to-Have
Stencil tension directly affects print registration and paste release consistency. A high-quality inspection machine should offer:
Multi-position testing – tension can vary across the stencil surface; single-point measurements are insufficient
High-accuracy tension meter – look for ±1 N/cm accuracy with a range of 0–60N
Tension degradation over cleaning cycles is a leading cause of print defects. Regular, automated tension verification gives you the data to make informed decisions about stencil retirement—before defects occur.
5. Optical System: The Eyes of the Machine
The quality of the optical system determines what the machine can—and cannot—see. Key specifications include:
Camera resolution – 20 megapixels provides the detail needed for micron-level aperture analysis
Lens – A 12mm 1/4" lens paired with appropriate magnification ensures sharp imaging across the inspection field
Lighting – White LED light source delivers consistent, uniform illumination essential for repeatable defect detection
Field of View (FOV) – 120 × 150mm per FOV balances coverage with resolution
The combination of high-resolution imaging and proper lighting is what separates a reliable inspection system from one that misses critical defects.
6. Stencil Compatibility and Inspection Range
Your inspection machine must accommodate the stencils you actually use. Critical dimensions:
Maximum inspection range – 600 × 600mm covers the vast majority of SMT stencil sizes
Stencil frame support – Ensure the machine can handle your frame dimensions (e.g., up to 736 × 736 × 60mm)
A machine that cannot accommodate your largest stencils is a non-starter. Conversely, over-specifying on size without need adds unnecessary cost.
7. Software and Usability: Where Productivity Lives
Hardware is only half the equation. The software interface determines how quickly your team can adopt and effectively use the system:
Template setup – Look for standard image template setup with 2–3 minutes programming time. Long setup times eat into productivity, especially when switching between different stencil types
Offline testing mode – Enables inspection without tying up production lines
User authority management – Separate operator and tester permissions for quality control and audit compliance
QR code management – Standard QR code functionality for stencil tracking and traceability
Search functionality – The ability to search by clean times and inspection timestamps supports process analysis and root-cause investigation
Software that is intuitive and data-rich transforms the inspection machine from a quality gate into a process improvement tool.
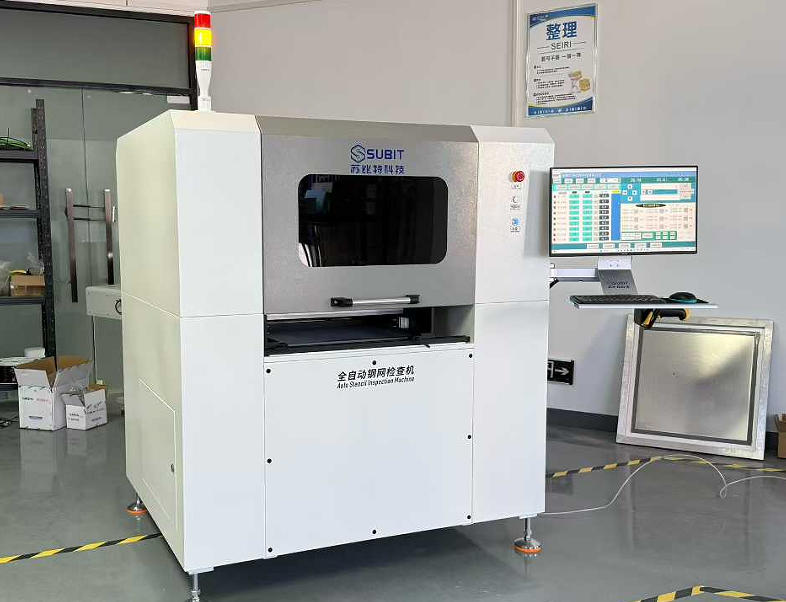
8. Physical Footprint and Operating Conditions
Don't overlook the practical considerations:
Dimensions – 1380 × 1250 × 1750mm is typical for a floor-standing unit
Weight – 800kg requires proper flooring and installation planning
Construction – Stainless steel weld with painting ensures durability in factory environments
Drive system – Servo motor + PLC provides reliable, precise motion control
Power – AC 220V ±10% (single phase), 50/60Hz, 2KW
Air pressure – 0.8 MPA for pneumatic components
Also verify that the machine's vibration tolerance meets your factory conditions—specifications should state that vibration does not affect inspection accuracy.
9. Computer and Data Management
The onboard computer is the brain of the inspection system:
Operating system – Windows 10 X64 Professional Edition ensures compatibility with standard software and network integration
Hardware – i7 processor, 32GB memory, 1TB hard drive provides ample processing power for image analysis and data storage
Display – 24-inch LCD for clear visualization of inspection results
Data generated by the inspection machine should support SPC analysis and quality reporting, enabling continuous process improvement.
10. Service and Support: The Long-Term Relationship
Even the best equipment requires support. Evaluate:
Warranty – 12 months for the whole machine is industry standard
Software upgrades – Lifelong free upgrades protect your investment as software evolves
Service response – 7×24 support with feedback within 8 hours minimizes downtime when issues arise
A machine that sits idle due to poor support costs far more than the initial purchase price.
Final Thoughts
Choosing the right automatic stencil inspection machine for fine-pitch SMT comes down to matching specifications to your specific production reality. Prioritize inspection accuracy and repeatability above all—these are the foundation upon which everything else rests. Then evaluate speed, tension testing capability, optical quality, and software usability against your throughput requirements and team capabilities.
The right machine doesn't just catch defects; it gives you the data to prevent them. And in fine-pitch SMT, prevention is not just better than cure—it's the only path to sustainable yield and profitability.
Previous: Vacuum Planetary Deaeration Defoaming Mixer – High-Capacity, Bubble-Free Production Solution Next: Screen Stretching Machine – A Buyer’s Guide to Screen Stretching Machines


